
Changing the color of images in Photoshop so easy, you can do it in a minute. This little handy trick can save you a lot of time as there is no need to draw that same shape again when you need it in another color (or to pay for another download). I use this trick a lot in my clip art and other digital art when working with hand drawn images and not with vectors. In an ideal world every digital image would be a vector as it is much easier to work with, but when you’re working with hand-drawn images the vector files are usually non-existent. Read on for a step by step tutorial on how to Change The Color of PNG’s In Photoshop.
Here is how to change the color of your PNG’s in Photoshop using the Hue / Saturation method.
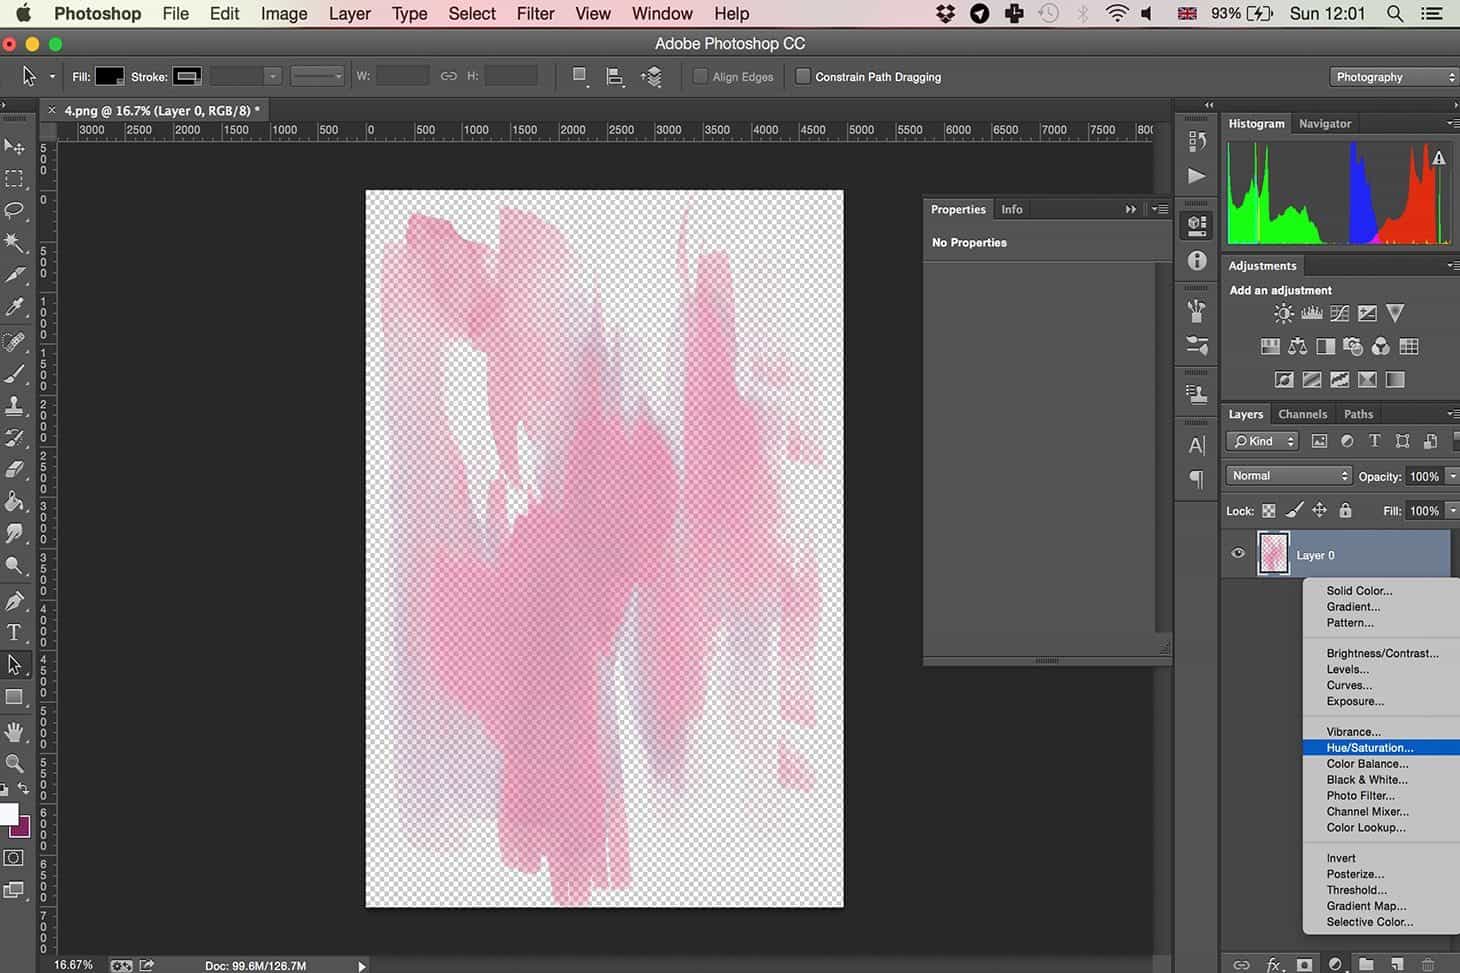
1. Open your document. File / Open. I’m going to be editing one of my watercolor backgrounds.

2. If you have multiple layers in your file then select the layer you want to change the color of. Highlight that layer. For simplicity, I am using a file with a single layer. In your Layers Panel, click on the black and white circle to see image adjustment options. Choose the Hue /Saturation option.
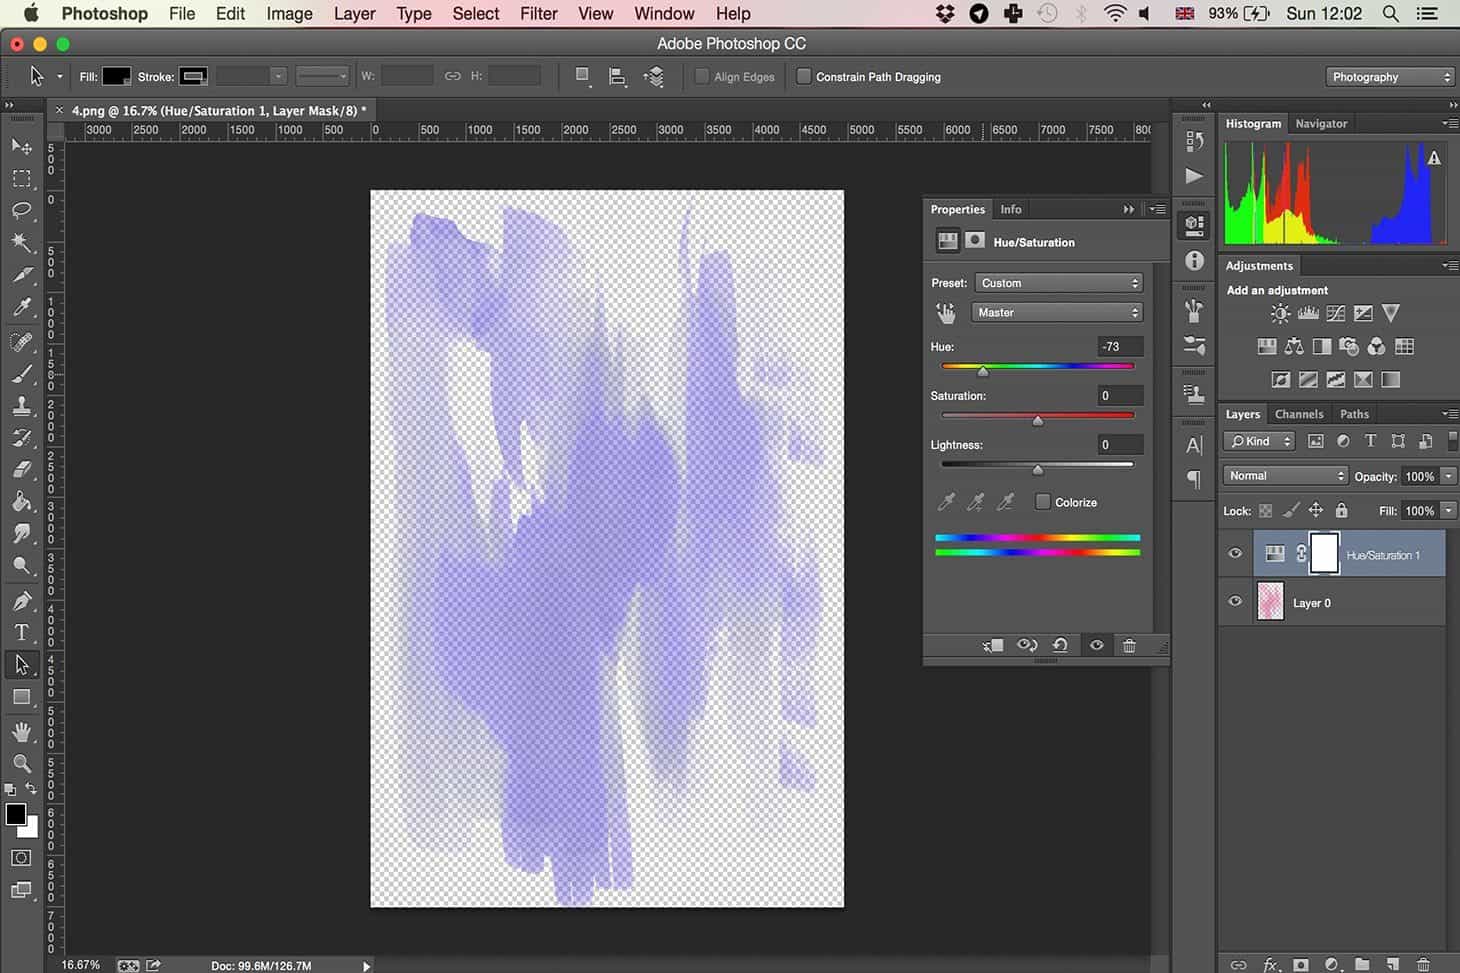
3. This will create a Hue / Saturation layer and a properties box for the Hue / Saturation will appear. Move the Hue & Saturation sliders until you get the desired color. NOTE: I moved the Hue slider to the left to get a blue background instead of pink one.
4. Now just save the file in desired format and you are done. Isn’t it easy?
If you feel inspired then why not try changing colors of my watercolor flowers. You can download free flower clip art here.

